Device Configuration
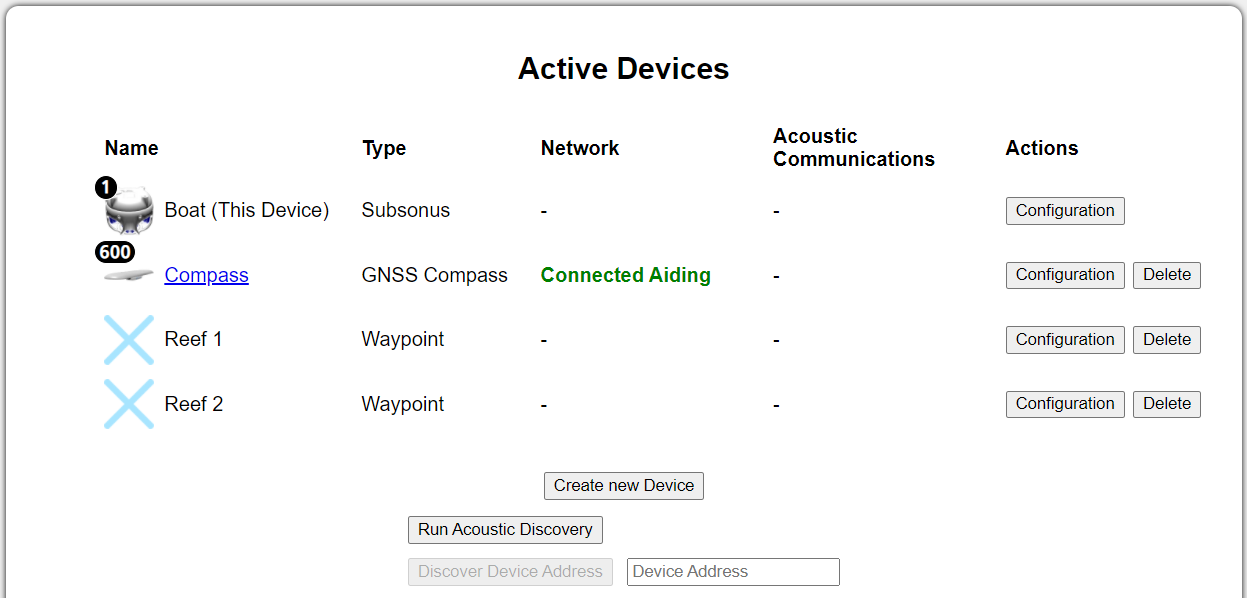
Devices that are available to be tracked or are to be added as aiding devices are visible on the “Configuration”→“Devices” page.

Devices Page
Creating a Track Target (Subsea device)
Targets can be created for Subsonus to track. These can be other Subsonus units, third party transponders, generic fixed tone transponders or periodic pingers such as emergency beacons. Subsonus should be configured as an acoustic master to track these devices.
To add a track target to Subsonus:
-
Navigate to the “Configuration”→”Devices” page.
-
Click the “Add New Device” button, a “Create New Device” wizard should appear.

Screenshot of New Device wizard
-
For “Device Type” select the required track target.
-
Enter the device specific configuration settings.
-
To track the device immediately, enable the “Track Device” flag.
-
Press the “Save Changes” button.
Alternatively, you can click the "Run Acoustic Discovery" button to discover acoustic devices.
Tracked Devices Configuration
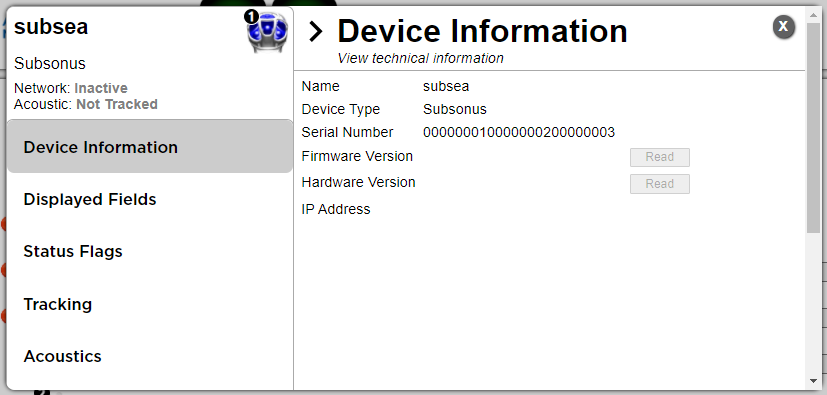
To configure tracked devices, click on the "Configuration" button next to the active device. The screen shown in Remote device Configuration window will appear.
To determine the data sharing method being used by the target, see the Network and Acoustic status information. When tracking acoustically, the Acoustic status will display "Tracking".

Each tab allows the user to configure or see the following:
|
Device Configuration: |
Displays the Hardware version, Firmware version and Serial numbers of the device. This information may be required by Application Support engineers. |
|
Displayed Fields: |
Allows the user to select the data displayed on the Main View for each device (see Main View) |
|
Status Flags: |
Displays current alarms, warning and status states |
|
Tracking: |
Allows the user to select the acoustic data protocol used during tracking operations. By default the data protocol is set to “Auto”, in this mode Subsonus will automatically select the optimal data protocol based on the acoustic conditions. The user may select between “High Speed” mode or “High Reliability” mode.
Also allows the user to enable or disable tracking for each device. When operating in slave mode, a Subsonus will automatically be configured to track a master unit. |
|
Model: |
Allows the user to choose a pre-set model to attach to a device |
|
Acoustics: |
Allows the user to set or change the Device Address of a tracked target, as well as view live acoustic data |
Subsonus Surface Unit Reference Source Aiding
Position and heading aiding for Subsonus can be provided by a surface reference source such as an Advanced Navigation GNSS Compass or INS device (such as Certus, Certus Evo, Boreas) - see Surface Unit Reference Source. When Subsonus connects to an Advanced Navigation product, it will automatically configure the required packets at the required rates.
Connect Device
-
Connect the GNSS Compass or INS device to the Network.
Add discovered Advanced Navigation Product
-
Navigate to the “Configuration”→”Devices” page
-
Locate the device in the Discovered Devices list
-
Select "Action” → “Add Device”
-
Locate the device in the Active Devices list
-
Select "Action” → “Configuration”
-
For “Offset [X,Y,Z]” enter the offsets from the Subsonus to the aiding device. For the GNSS Compass, this is the base of the unit. Ensure the offset directions are correct, forward is positive X, to the right is positive Y and up is negative Z
Note: The values set for the offset between the surface Subsonus and surface unit reference source must be correct for the devices to function accurately.
-
Under the "Local Settings" tab, check the “Enable Device” to use the device as an aiding source
-
Press the “Save Changes” button
Add new undiscovered Advanced Navigation Product
-
Navigate to the “Configuration”→”Devices” page
-
Click the “Add New Device” button, a “Create New Device” wizard should appear.
-
Select the device type from “Device Type” in the “Advanced Navigation Aiding Source” section and update the device name as desired, click “Next”
-
For “Offset [X,Y,Z]” enter the offsets from the Subsonus to the aiding device. For the GNSS Compass, this is the base of the unit. Ensure the offset directions are correct, forward is positive X, to the right is positive Y and up is negative Z
Note: The values set for the offset between the surface Subsonus and surface unit reference source must be correct for the devices to function accurately.
-
Enter the IP Address or host-name of the device (e.g gnss-compass.local, certus.local etc) . This can be found using the Device Discovery tool in Subsonus Tools, see Device Discovery
-
Enter the Port Number 16718, click “Next”
-
Enable the device as an aiding source, click “Next”
-
Press the “Save Changes” button
Generic NMEA GNSS Compass Aiding
-
Navigate to the “Configuration”→”Devices” page.
-
Click the “Add New Device” button, a “Create New Device” wizard should appear.
-
Enter a device name, click “Next”.
-
For “Device Type” select “GNSS Compass – Generic NMEA”, click “Next”.
-
For “Offset [X,Y,Z]” enter the offsets from the Subsonus to the NMEA Position provided by the device.
Note: The values set for the offset between the surface Subsonus and NMEA device must be correct for the devices to function accurately.
-
Enter the IP address or host-name of the device hosting the TCP server providing this data.
-
Enter the TCP Server Port Number, click “Next”.
-
Press the “Save Changes” button.
Subsea Subsonus Aiding
Subsea Subsonus aiding devices such as a DVL can be configured for additional external velocity data, see External Aiding Devices. Certain DVLs are preconfigured to be discovered by the subsea Subsonus when connected to the same network, including Nortek and Waterlinked DVLs.
Add DVL
-
Navigate to the “Configuration”→”Devices” page of the subsea Subsonus web UI, if the DVL is on the subsea vehicle.
-
Click the “Create New Device” button, a “Create New Device” wizard should appear.

Screenshot of New Device wizard
-
For “Device Type” select the required DVL, "Nortek DVL" or "Waterlinked DVL".
-
Enter the device specific configuration settings, ensuring the device address is unique.
-
For “Offset [X,Y,Z]” enter the offsets from the subsea Subsonus to the reference position of the DVL as defined in the DVL technical reference manual.
-
Enter the IP address or host-name of the device hosting the TCP server providing this data.
-
Enter the TCP Server Port Number, click “Next”.
-
Press the “Save Changes” button.
Note: The values set for the offset between the surface Subsonus and DVL must be correct for the devices to function accurately.
-
Once the DVL is listed under "Active Devices", select the "Configuration" button.
-
Under the "Local Settings" tab, check the “Enable Device” to use the DVL as an aiding source
-
Press the “Save Changes” button
Subsonus Remote Acoustic Data
Unless there is a network link between the Subsonus units they will acoustically transfer their position, orientation, depth, VOS, system status, filter status and time to the remote device.
Subsonus also supports sending user data over the acoustic link, please see Modem Data Transfer for details.